This weekend was all about stripping the old paint from the bike and preparing the surface for the new auto paint I have coming. It's an extremely tedious and messy process, but necessary to achieve a high-quality finish.

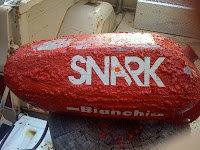
Here you can see the tank with some high-strength epoxy/paint remover on it. Crazy stuff. Whoever painted the bike before I got it used pretty low quality paint to so that layer was eaten off pretty easily.

A few coats of stripper, a razor, and some sandpaper made short work of the decals and the surface turned out to be pretty smooth. It's really handy that Snark's have detachable tanks.

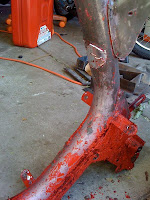
Next I started with the frame. Layer after layer was slowly removed and scraped away, the crevasses and welds in the frame being the biggest pain in the ass. Luckily, the most difficult spots are located up underneath the frame so the blemishes will be minor.

It turned out kind of odd how the original color, the darker red under the old paint in this photo, is very similar to the new paint color I'm going with. It was obviously higher quality and took 6-8 coats of stripper to finally remove off the frame and fenders.

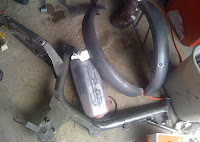
Here's the nearly finished pieces. There's still some gunk in the seams which I may pressure-wash to ensure they are as clean as possible, but other than that just some light sanding and I'm ready for primer!
 A few coats of stripper, a razor, and some sandpaper made short work of the decals and the surface turned out to be pretty smooth. It's really handy that Snark's have detachable tanks.
 Next I started with the frame. Layer after layer was slowly removed and scraped away, the crevasses and welds in the frame being the biggest pain in the ass. Luckily, the most difficult spots are located up underneath the frame so the blemishes will be minor.
 It turned out kind of odd how the original color, the darker red under the old paint in this photo, is very similar to the new paint color I'm going with. It was obviously higher quality and took 6-8 coats of stripper to finally remove off the frame and fenders.
 Here's the nearly finished pieces. There's still some gunk in the seams which I may pressure-wash to ensure they are as clean as possible, but other than that just some light sanding and I'm ready for primer!


